Snap4Phiro is a Scratch-like programming environment that allows you to create projects with code to interact with Arduino boards, like the one Phiro has. You can now use Snap4Phiro to connect to Phiro robots!


Learners will be introduced to using Snap4Phiro programming language to program & control Phiro robot.
By the end of this lesson, learners will be able to
Snap4Phiro is a Scratch-like programming environment that allows you to create projects with code to interact with Arduino boards, like the one Phiro has. You can now use Snap4Phiro to connect to Phiro robots!
1. Turn on Phiro
2. Press Phiro's Mode buttom till Bluetooth is enabled in Phiro. (Blue LED will glow in Phiro Display Panel)

3. Pair Phiro Bluetooth with system Bluetooth. (Passcode : 1234)
4. Download Snap4Phiro on your computer
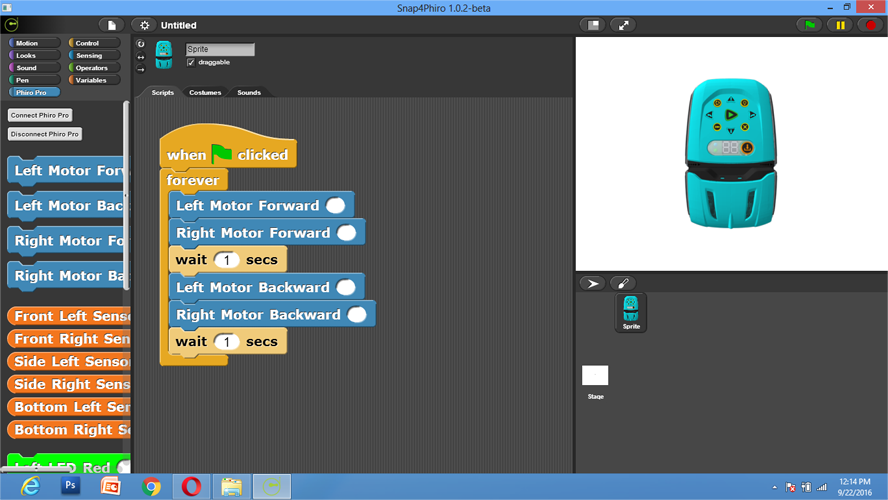
5. Open the Snap4Phiro software on your computer
6. Go to "Phiro Pro" Block in Snap4Phiro Software
7. Select Connect Phiro Pro

8. Select Phiro Com Port

9. Wait till the message on the right appears
10. Wait for Phiro to connect with Computer
You will know Phiro is paired when both Green LED glows next to Blue LED on Phiro Display Panel). Note down the Com Port when computer Bluetooth pairing with Phiro.

Go to "Phiro Pro" Blocks.
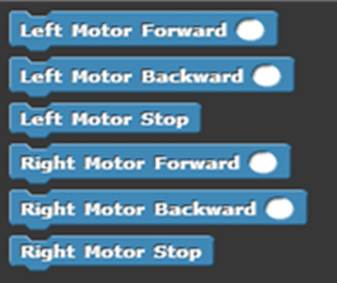
Phiro Motor Blocks, Left Motor & Right Motor, Range : 0 to 255 (0 is no speed, 127 is 50% speed, 255 is max speed)
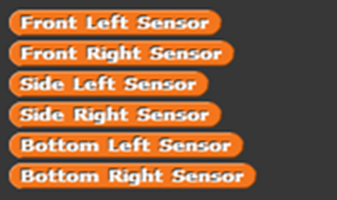
Phiro Sensor Blocks Range → 0 to 1024, Detect Black → High value, Detect White → Less value
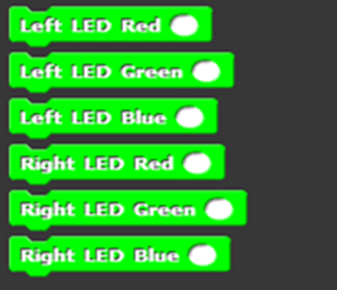
Phiro LED Light Blocks, Left LED & Right LED, Range : 0 to 255 (0 is no light, 127 is 50% light, 255 is max light)
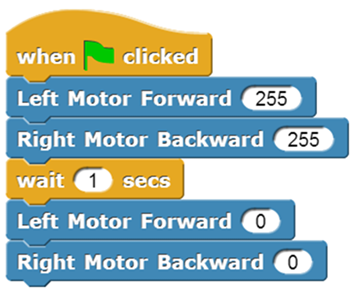
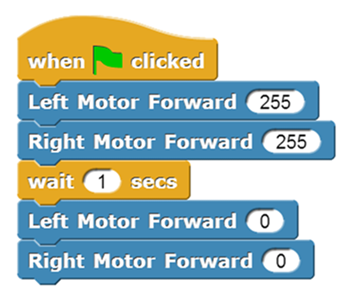
Create a program in Snap4Phiro to move Phiro forward for 1 second and stop.
Click the Green Flag and watch Phiro act out your code!
What can you make Phiro do next?
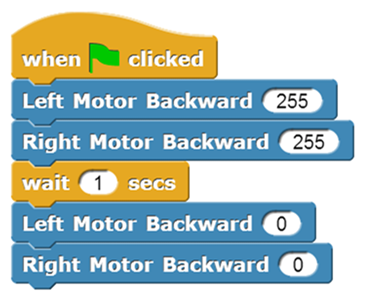
Create program to move Phiro Backward for one second and stop.
Create program to turn Phiro right for one second.